Take Camera Snapshot
ActionStep Reference » Windows » Camera » Take Camera Snapshot
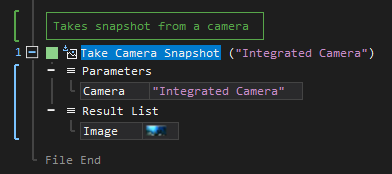
The ActionStep Take Camera Snapshot allows you to use either the built-in or external camera to take a photo and store it as an image file on your device. It automatically locates the cameras connected to your device and displays a list of available cameras to be used.
- Open the Windows node in the Workspace Explorer.
- In the Camera node, select the Take Camera Snapshot ActionStep.
Parameters:
The ActionStep has the following input parameters:
| name |
Description
|
|---|---|
|
Camera
|
Specifies the camera to be used in taking a snapshot.
Allowed Context Scopes [Fixed, Local, Global] Allowed Context Type [Variable, Parameter, Enum] |
Results:
The ActionStep returns the following results:
|
name
|
description
|
|---|---|
| Image |
The snapshot taken from the devices' camera.
Allowed Context Scopes [Fixed, Local, Global] Allowed Context Types [Variable, Parameter] |

|
A specific error message appears if the camera does not provide an image. |
Example 1 (Save an image from a snapshot):
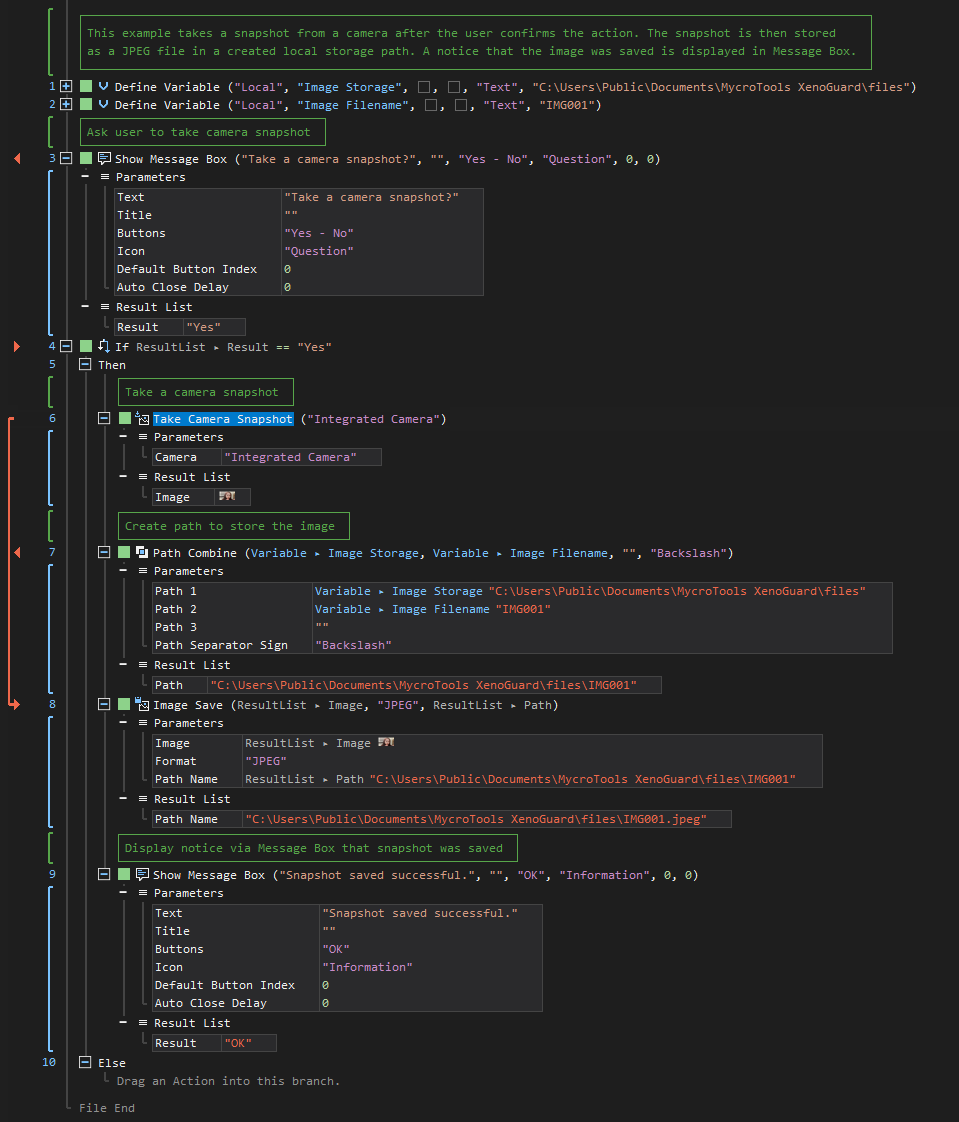
This example creates two local variables Image Storage and Image Filename which both have Text as data type. A snapshot is then taken after the user confirms the ActionStep and stores the image in JPEG format to a created local storage path from the value of the variables. A notice is then displayed via Message Box that the image was successfully saved.