Scheduler Window
The Scheduler in XenoGuard is a versatile tool that automates and schedules a range of tasks and processes within the software. It's not just a basic scheduling tool; it offers deep integrations and customizations to enhance workflow and efficiency.
Scheduler List
The Scheduler list is the central component of the Scheduler. It displays all existing scheduler entries, providing an immediate overview of planned scripts, their last execution time, and current status. The clear, structured layout of the list aids in navigation and management, allowing for effective monitoring of scheduled script executions.

Manage scheduler entries using the small buttons in the top left-hand corner:
- Add: Click here to create a new scheduler entry.
- Delete: Use this button to remove selected scheduler entries. Ensure the correct entries are selected before confirming the deletion.
- Enable All: Activates all scheduler entries, triggering all scheduled scripts and actions at their specified times or events.
- Disable All: Deactivates all scheduler entries, preventing the execution of assigned scripts and actions until reactivated.
Details of the scheduler list elements:
| Column | Description |
|---|---|
| Enabled Checkbox | Indicates if a scheduler entry is active (checked) or inactive (unchecked). An active entry executes its script at the scheduled time/event. |
| Created At | Timestamp of scheduler entry creation, helping track older and newer entries. |
| Name | Unique name of the scheduler entry for easy identification and management. |
| Action Script | Path and name of the script executed by the scheduler entry. |
| Trigger | Defines the event or time for script execution, like a specific event or time-based interval. |
| Configuration | Information about the environment or configuration in which the script executes, e.g., Production. |
| Current State | Shows the current status of the scheduler entry, e.g., initialized or waiting. |
| Next Run | Displays the next scheduled execution time. |
| Last Run | Indicates the last execution time. |
| Last State | Shows the last execution status, e.g., success or errors. |
Turning the Scheduler On and Off
XenoGuard's ribbon menu features a Scheduler button for central activation or deactivation of the scheduler. When activated, the scheduler executes all scripts in the list as per their schedules or trigger events. When deactivated, it stops, and no scheduled actions or scripts are executed until reactivated. This feature allows users to easily manage the scheduled execution of scripts.

Editing Scheduler Data
To edit a scheduler entry:
- Select the entry in the scheduler list.
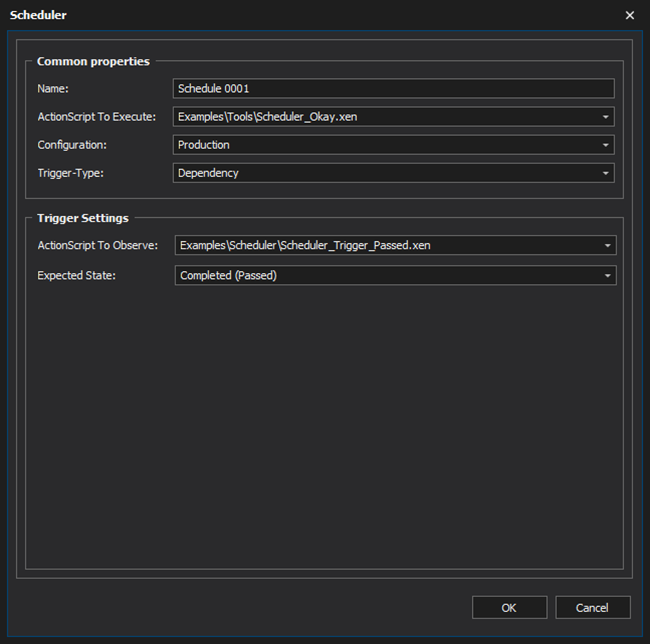
- Click the ellipsis symbol (e.g., next to the Name entry) to open a dialog box.
- Choose the trigger type and complete the required fields.
- Click OK to save changes.

Common Properties
All scheduler configurations share these common properties:
- Name: The schedule's name.
- ActionScript To Execute: The script scheduled for execution.
- Configuration: The environment in which the scheduler runs, e.g., Production.
- Individual Trigger Types: Four different trigger types, each with unique properties.
Trigger Types
XenoGuard distinguishes between these trigger types:
| Trigger Type | Description |
|---|---|
| Start | Executes the script after a delay following XenoGuard's start. Delay after Boot Up: Post-system startup delay, e.g., "1 minute". |
| Periodically | Executes the script at regular intervals. Interval: Frequency of execution, e.g., "00:00:01". Repetitions: Number of repetitions, e.g., "Endless" for infinite repeats. |
| Dependency | Triggers the script once another script's status changes. ActionScript To Observe: The script under observation. Expected State: The anticipated state of the observed script. |
| Schedule | Executes the script at calendar time intervals. Trigger Settings: Frequency of action/script repetition, e.g., daily, weekly, monthly. |